
In This Article
Overview
Editing a KPI

Navigate to Analysis > KPIs, then click on the Name of the KPI you want to edit. This will open to one of the KPI Toolbar sections. Next, follow these steps in the Configuration toolbar settings:
Configuration

Navigate to the Configuration toolbar settings on the three-bar menu. This will open the Configuration settings screen, similar to the screenshot above. Then, navigate to the Settings section towards the bottom of the screen. Expand the Settings section by clicking on the drop-down arrow to view the options, similar to the screenshot below:
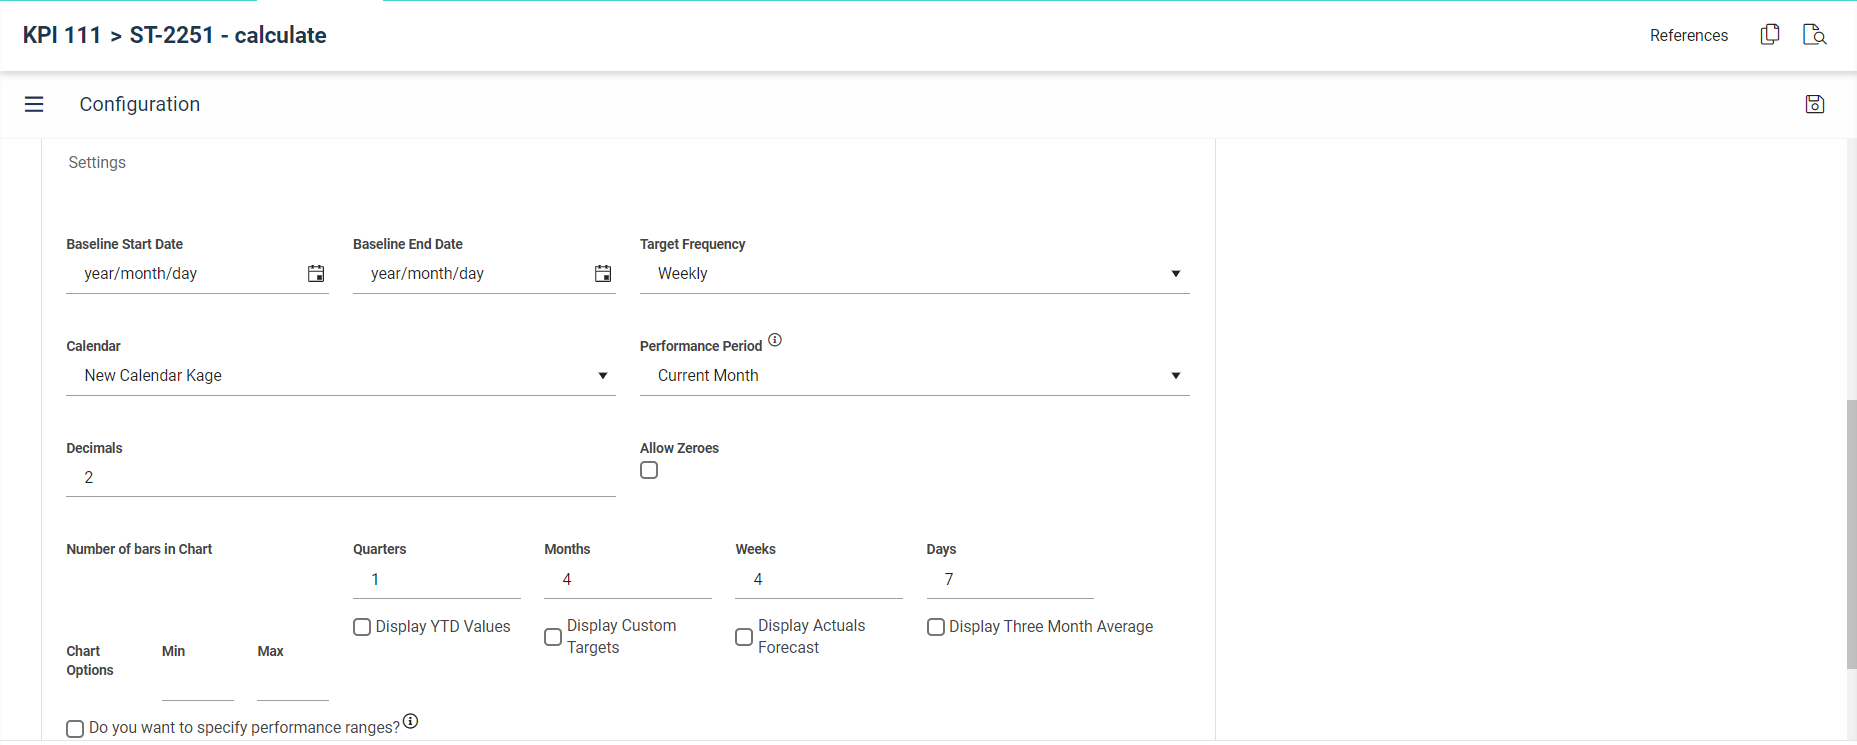
On the following Settings screen, you can specify the Baseline Start Date and Baseline End Date to define the data display duration, alongside selecting the reporting Target Frequency for the KPI, which is particularly useful for financial years or alternative calendars. You can also set the Performance Period to determine the KPI's progress, which as a result, influences the status color on the chart. In addition, you can also specify the number of Decimal places to display as well as check the Allow Zeros box to display fields with zero values on the chart. The settings also include the options to determine the Number of Bars to display on the chart for each field. Additionally, you can check additional boxes under the different Time Periods to include extra data on the chart as well set minimum and maximum amounts for the chart display under Chart Options. Enabling the Do you want to specify performance ranges option allows you to set Below Target and Above Target figures on the chart to indicate if the data is on track or at risk. Enabling this option displays the following screen below:

Calculation
Convert the KPI to a calculated KPI by adding references and specifying the applicable formula to be used. A Calculated Key Performance Indicator (KPI) provides a more comprehensive and insightful measurement of specific aspects of an organization's performance by combining or manipulating existing data. Calculated KPIs are designed to offer a deeper understanding of various processes, operations, or objectives within a business.

In the same Configuration toolbar settings, navigate to the Calculation section towards the bottom of the screen. Expand the Calculation section by clicking on the drop-down arrow to view the options, and tick on the check-box for Do you want to create a calculated KPI. This opens a section similar to the screenshot below:
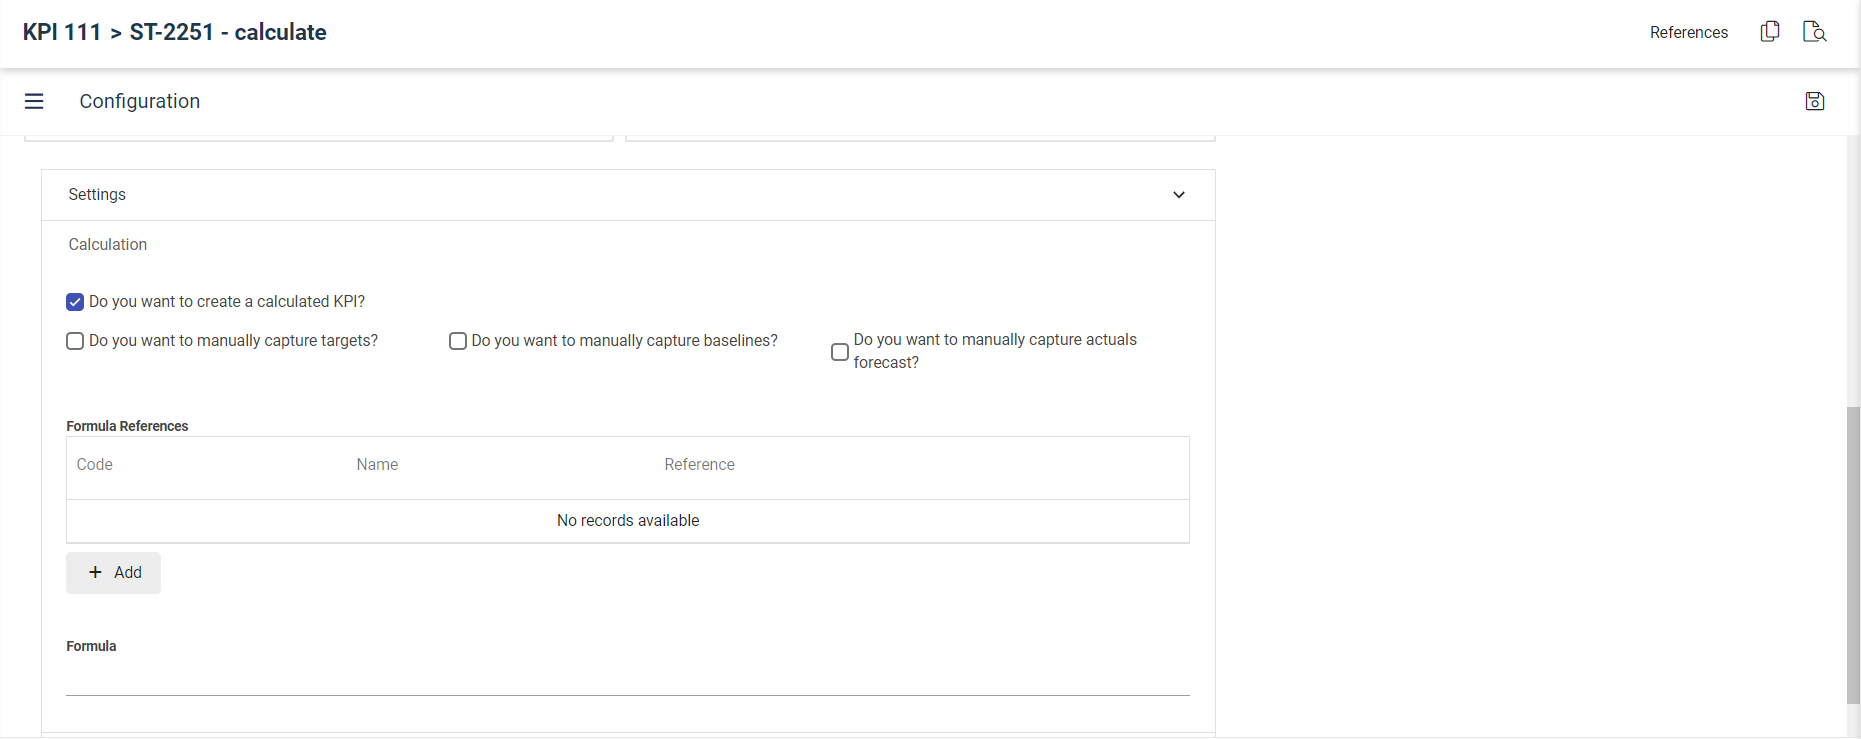
If you would like to manually capture Targets, Baselines, and Forecasts, check the respective boxes. To select the KPIs you want to use, click on +Add option under Formula References. This opens the screen similar to the screenshot below. You can search for the KPI by Name, Owner, or Portfolio. Once you have found the desired KPI, click on it, then click the Add button. Repeat these steps to add multiple KPIs. Once these KPIs have been added, they will appear under the Formula References section in the Configuration screen. These KPIs may now be used in the creation of a formula for the calculated KPI. You can then enter the formula to calculate the new KPI, such as subtracting B from A to get the difference of the values, followed by clicking Test Formula to confirm whether the arithmetic is correct. With these configurations and values, the new calculation methods will generate a value for the calculated formula (see screenshot below for reference) 
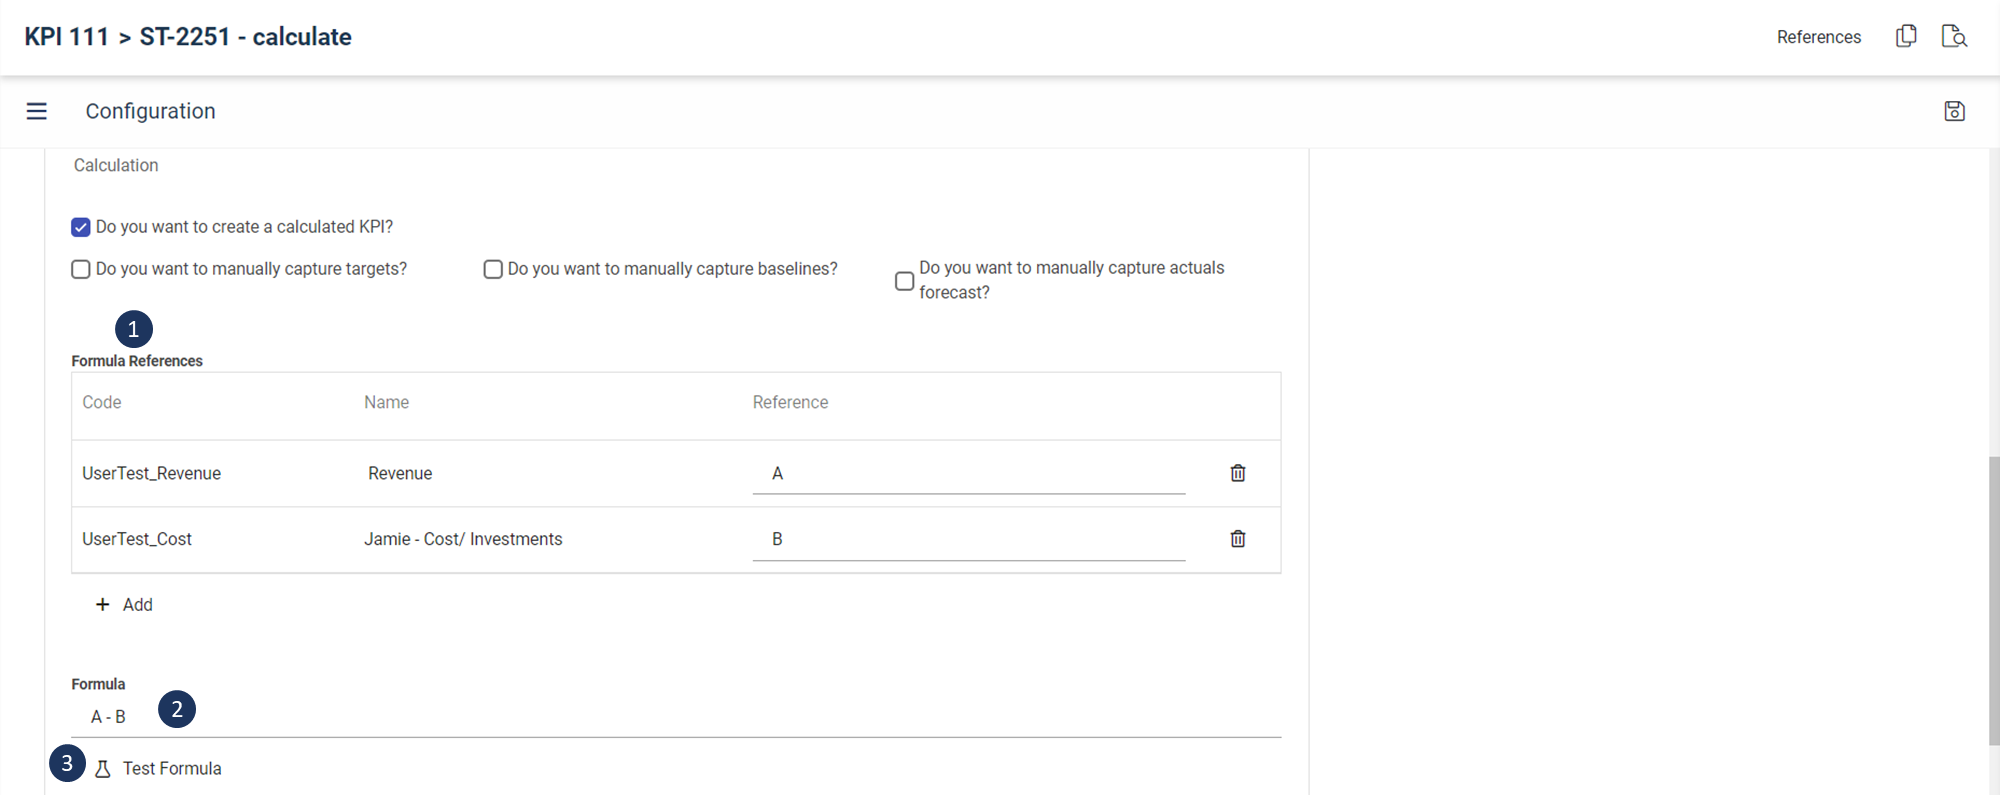
Warning: Remember to click Save at the top right to avoid changes being lost.Access

Under Configuration toolbar section, click on the Access tab towards the end of the screen to expand the section. Under Access, select one of the following options: Default and Confidential are customisable, while choosing Global will grant access to everyone. The Name of the User or Role will be displayed here, and Type will indicate whether the permission is for a User or a Role. To add specific Users or Roles to the access profile, click +Add and search for them.
Warning: Remember to click Save at the top right to avoid changes being lost.Next Steps
Now that KPI has been created and edited the next stop is to add values to your KPI, see article KPI Values.